Data migration is the processes of transferring data from the old ERP system to the new ERP during the times of upgrade or new ERP implementation. There are various ways of achieving this which includes using tools like MDI or making use of standard M3 APIs. There are certain cases where there may be no standard M3 API available or there are multiple tables involved making it difficult to migrate using M3 Data Import (MDI).
One alternative workaround for this shortcoming is to create custom M3 APIs to migrate data. We can make use of the M3 Web Services (MWS) tool to create custom M3 APIs which can be used in MEC maps to migrate the data. In this post, we will go through the step by step process of creating a custom API using MWS Display program and making use of the same in MEC maps for migration.
For everyone’s understanding, let’s go through the same, simple use case throughout the blog. We will be creating a custom web service to add Product Cost prices into the program PCS260 since it does not have a standard M3 API to add the prices.
Creating New WebService
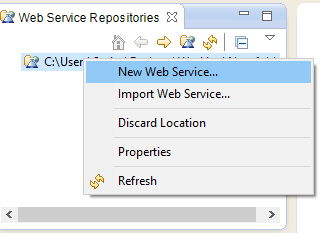
- Open eclipse and turn on the MWS plugin. Then right click on the repository and select New Web Service option.
- Enter the name of the web-service that you need to create and press finish.
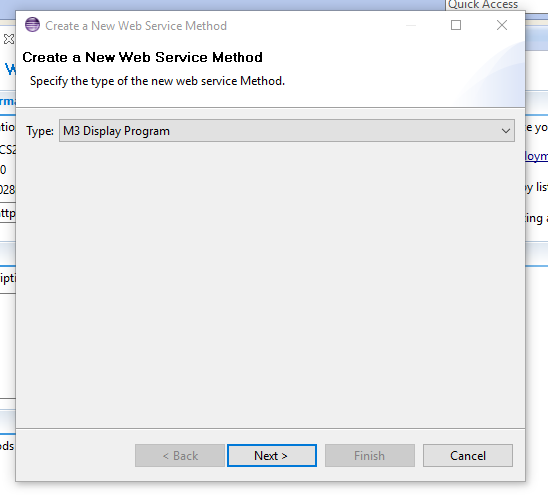
- The next dialogue box should request the type of the web service that needs to be created, select M3
Display Program and click on Next:
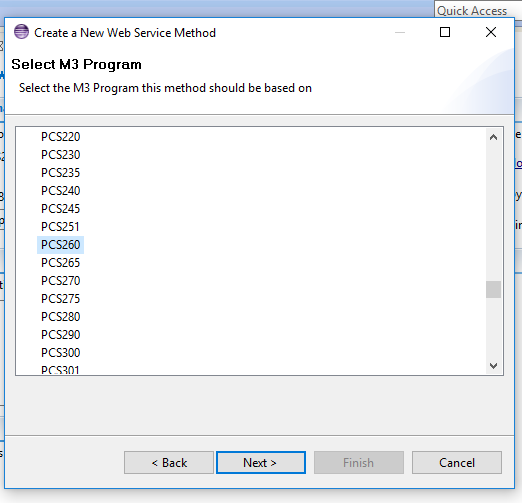
- The subsequent panel should prompt to select a M3 program for which M3 Program needs to be created:
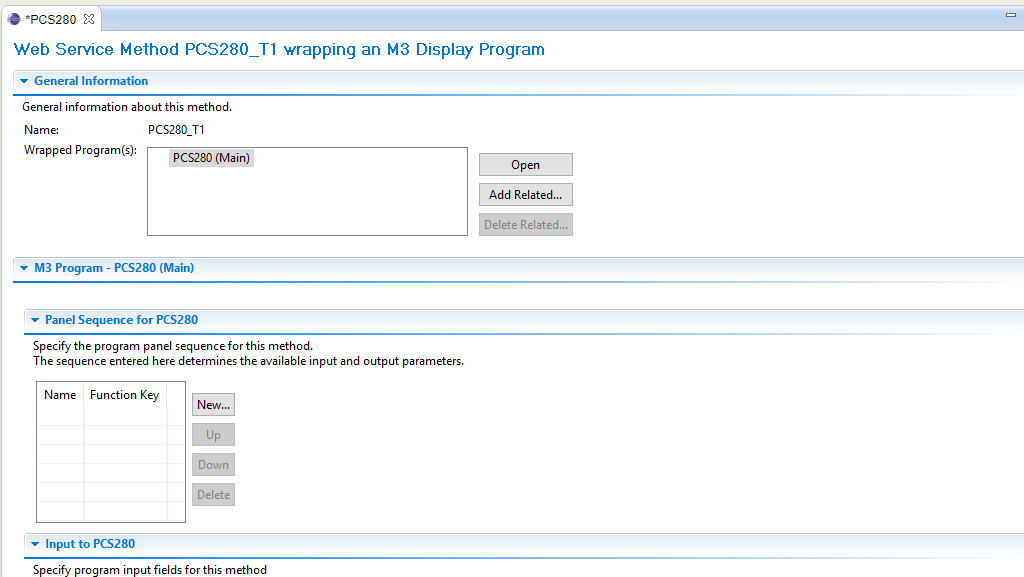
- Now the new web-service tab should open :
Our next step is to simulate the exact process done in M3 and replicate here. In this case, PCS260 is the selected program where there is no standard API to add records to the program.
The first thing that we do in M3 is to open the program PCS260 through Panel A (can be done through Settings):
- The next step is to enter the values into the fields and select Options-> Create. This would take us to Panel E where the cost is entered; click Next to continue
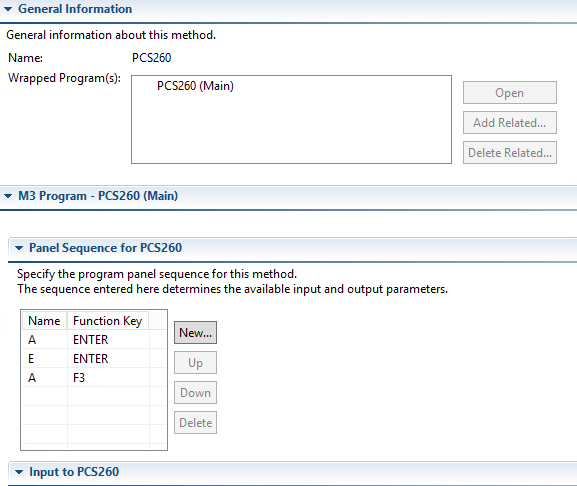
- Once the steps are known, the same process is to be replicated in the designer. The panel name and the corresponding function key is entered under Panel Sequence. The corresponding panels and panel close is also specified, which is the same process done in M3.
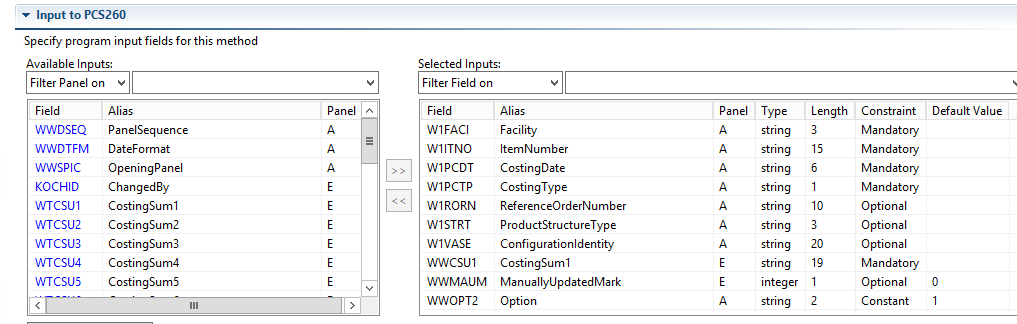
- Next the inputs to the fields need to be entered in the input panel. Since the operation is create, here the
Option is set to constant 1 –
- Once the inputs are entered, right click on the web service on the top left panel and select deploy. Provide the server details, credentials and deploy the web service to MEC.
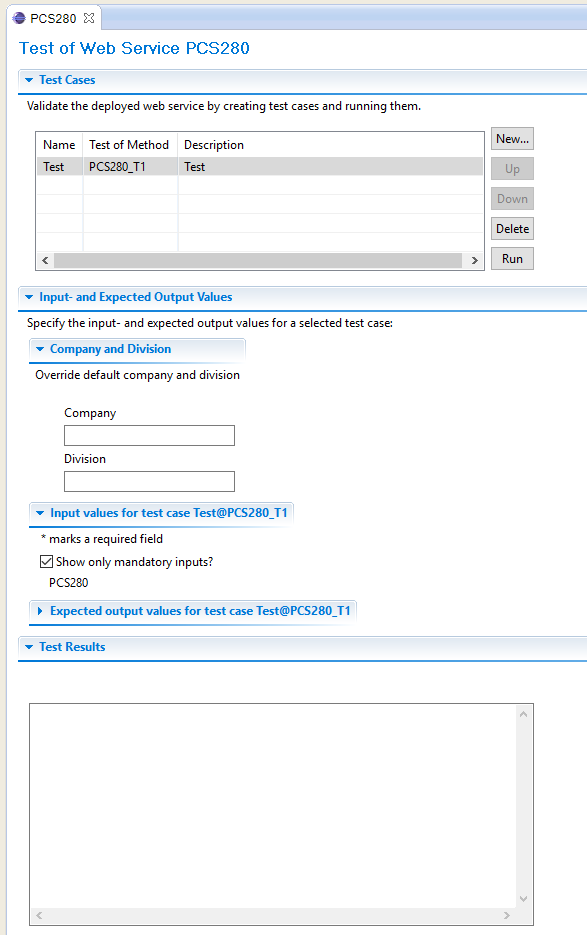
- Once the web service is deployed, you can test the same using the test tab. We can specify the test cases, provide the inputs manually for each test case and see the results:
Calling Custom API In MEC
- Once the web service is deployed we should be able to see it in MWS tab of MEC, under Lists:
- The next step is to create .jar files for the WSDL and then have them deployed into MEC along with other .jar files.
- Once the .jar files are deployed, we can call the functions inside the jar to make the API call:
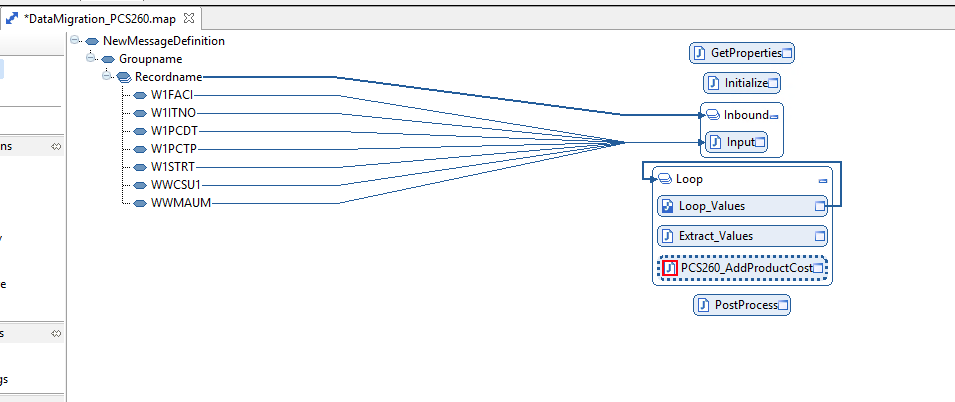
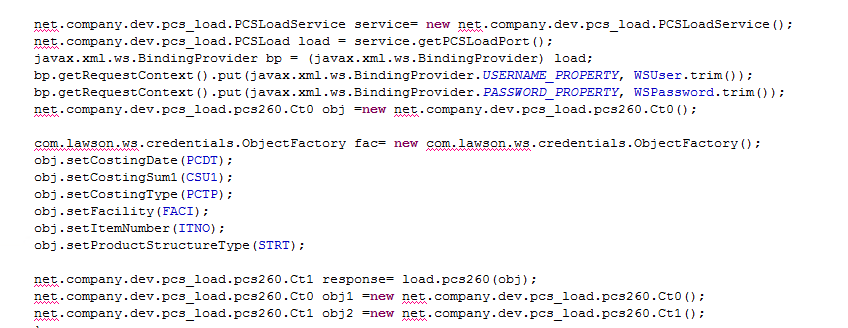
Now we can drop the .csv file containing all the required details and the MEC map should be able to run through all the records and successfully update the PCS260 program.
Get in touch with Doppio Group by filling out the contact form to see how we can implement a proven data migration statregy using Infor M3.